how to scan documents on iphone : Every so often, we as a whole need to check a record — a receipt, a recipe, guidelines from a book — however undeniably a larger number of individuals have an iPhone or iPad than an equipment scanner. Fortunately, Macintosh has incorporated an examining capacity into iOS, iPadOS, and macOS for certain years now. Whenever you're confronted with a piece of paper that you want in computerized structure, adhere to the guidelines underneath.
Filter Straightforwardly with an iPhone or iPad
The generally secret key to filtering with an iPhone or iPad is the Records application, which allows you to examine at least one pages and save a PDF anyplace you like. Since it's especially simple to utilize iCloud Drive with Documents, it's an effective method for making a record you can work with on your Macintosh later. (You can likewise check into a note utilizing the Notes application, however that is for the most part helpful for putting away data as opposed to making records you can transfer to the Internet, email, or offer in alternate ways.)
1. Open the Records application, tap Peruse in the toolbar, and explore to the envelope where you maintain that the examined archive should wind up.
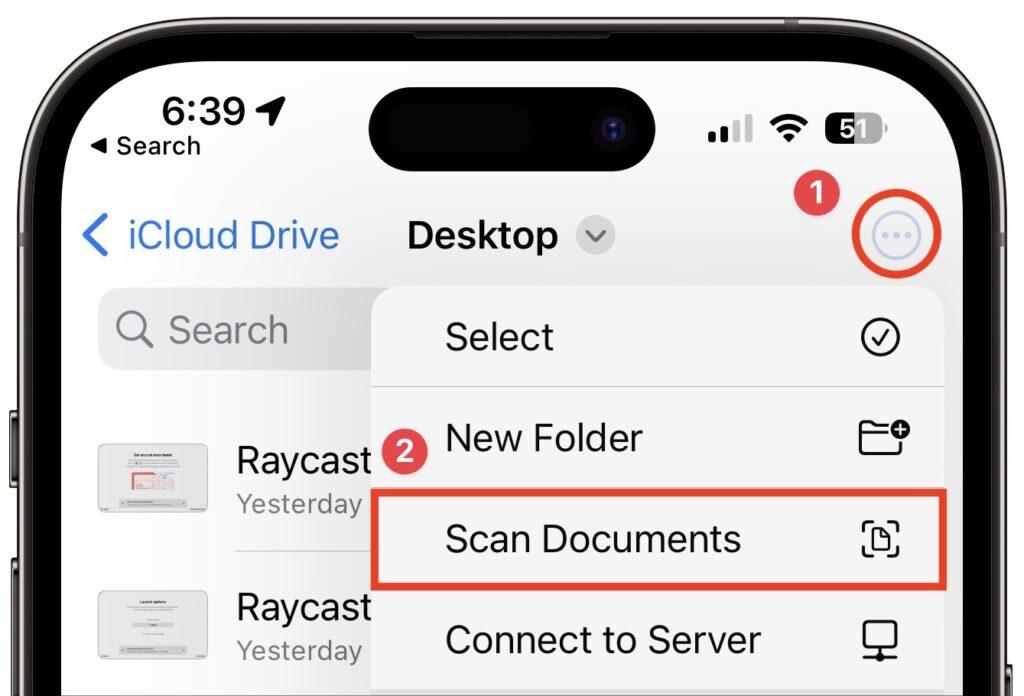
2. at the upper right and select Sweep Records.
3. The camera viewfinder shows up. At the highest point of the screen, note the controls for the blaze (the lightning bolt), the variety channel, and the Auto/Manual switch (underneath left). Quickly tap Auto to change to Manual — we suggest utilizing Manual until you've become liquid enough with the controls to allow your gadget to check for you. You rarely need to change the glimmer setting, however you can drive the blaze on or off assuming you like. Essentially, the variety channel choice defaults to a variety check, however you can set it to grayscale or high contrast in the event that you need. It's simpler to roll out that improvement a while later.
4. Hold the iPhone consistent so it can recognize the edges of the paper. At the point when it has, tap the round white screen button to snap a picture (above left). In Auto mode, it will simply continue to take pictures for you, which is proficient with numerous pages however upsetting on the off chance that you're not prepared.
5. Analyze the output to check whether it looks great. You can drag the corners to change the choice to catch simply paper, or there's something off about on the other hand in the event that the picture, tap Retake for a second chance (above right). At the point when you have it as you need it, tap Keep Sweep.
6. To filter extra pages, put them in the viewfinder and rehash Stages 4 and 5 (beneath left). Or on the other hand, assuming you're finished, tap Save and bounce straightforwardly to naming your record (beneath right).
7. In the event that a page isn't the very way you need it, tap the picture well to one side of the shade button to make changes. at the base returns you to the past screen to change the corners once more. The variety channel Variety channels symbol inlineicon allows you to browse Tone, Grayscale, Dark and White, and Photograph — stay with variety or grayscale for most archives. Assuming that the archive came in at some unacceptable direction, tap the turn Pivot symbol inlineicon. On the off chance that the picture actually isn't however you would prefer, you can retake it or tap the garbage Waste symbol inlineicon to erase it. Assuming you've checked numerous records, you can swipe between them. Tap Done when you're done, and return to Stage 6 to save.
Sweep to Your Macintosh with Your iPhone or iPad
It's sufficiently simple to save a checked record to iCloud Drive or another document sharing help so you can get to it on the Macintosh or move it from the Records application to the Macintosh. Yet, assuming you want to examine straightforwardly to the Macintosh, you can do that as well.
In Review, pick Record > Import from iPhone > Sweep Reports. (Review will be familiar with every one of your gadgets, so it will have segments for every gadget.) A discourse will show up on the Macintosh, and your gadget will quickly change to the examining connection point.
how to scan documents on android : Everything works similarly as on the off chance that you started examining from the gadget, including the Auto/Manual switch and the need to tap Save when you're finished. Notwithstanding, rather than saving the report to Records, it will show up as another archive in See, where you can work with it like some other PDF and save it to your drive.